
TL;DR
Because Bubble hosts your site on its own infrastructure, Prerender.io connects through a Cloudflare Worker that sits in front of your domain. The Worker intercepts requests from AI crawlers and search engines and routes them to Prerender.io, while your website visitors go directly to your Bubble app. This integration takes around 30–45 minutes, assuming DNS propagation completes quickly — allow extra time if you are new to Cloudflare.
How the request flow works
| Browser or bot | Cloudflare | Prerender.io | Bubble |
|---|---|---|---|
| Visits your domain | Routes the request | Intercepts bot requests, serves pre-rendered HTML | Hosts your site, continues working as normal |
Your website visitors are unaffected. Cloudflare becomes the front door for your domain, handling the routing transparently.
Not sure if this is the right integration for your stack? Ask Nexus, your AI integration assistant, inside your Prerender.io dashboard. Describe your setup and Nexus will confirm the right path.
Step 1: create a Prerender.io account and copy your token.
If you don't have a Prerender.io account yet, create one at prerender.io.
Once logged in, go to Security and Access > Prerender Token in your Prerender.io dashboard and copy your token. You will need it in Step 6.
Step 2: create a Cloudflare account and add your domain.
If you don't have Cloudflare set up yet, complete this before continuing:
- Create a free Cloudflare account at cloudflare.com/sign-up.
- Add your root domain (example:
yourapp.com). - Review your DNS records in Cloudflare.
- Log in to your domain registrar and replace your nameservers with Cloudflare's nameservers.
DNS propagation can take a few minutes to a couple of hours. You don't need to wait before continuing. Your custom domain may be temporarily unreachable during this time, but your site remains accessible via your Bubble hosted URL (example: yourapp.bubbleapps.io).
For full setup instructions, see Cloudflare's DNS setup guide.
Step 3: remove your custom domain from Bubble.
If your custom domain is connected inside both Bubble and Cloudflare at the same time, the two services create a redirect loop and your site becomes unreachable. Only one service can be the front door. In this setup, that is Cloudflare.
- Open your Bubble project.
- Go to Settings > Domain and Email.
- Remove your custom domain (example:
yourapp.com,www.yourapp.com).
Your custom domain continues to work publicly. Cloudflare handles it and routes requests to Bubble.
Step 4: remove conflicting A records from Cloudflare.
Existing A records conflict with the Cloudflare Worker mapping you will create in the next step.
- In Cloudflare, go to your account home (or Websites) and click your domain.
- In the left sidebar, click DNS > Records.
- Delete all A records where the Name is
wwwor your root domain (yourapp.com).
Step 5: create a Cloudflare Worker.
This step uses Cloudflare's browser-based inline editor. When creating your Worker, choose the quick-editor (single-file) path rather than a Git-connected template. The screenshots below reflect that flow.
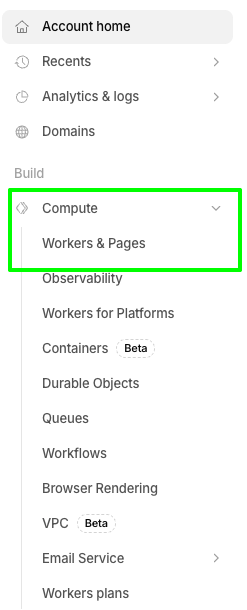
- Log in to Cloudflare and go to Workers & Pages (you may find it under Compute or Compute and AI in the sidebar, depending on your account).
- Click Create application.

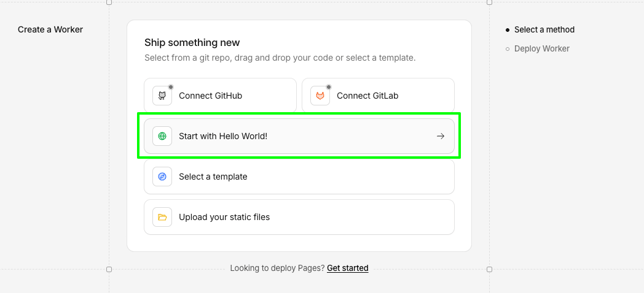
- Select the Hello World worker template (the exact label may vary — choose the simplest starter template available).
- Name the Worker something like
bubble-prerender. - Click Deploy.
Step 6: add your Prerender.io token and Bubble upstream to the Worker.
- Open your Worker and go to Settings.
- Find Variables and Secrets.
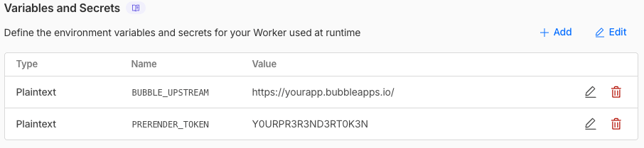
- Add a secret for your Prerender.io token:
- Name:
PRERENDER_TOKEN - Type: Secret
- Value: your Prerender.io token

- Name:
- Add a second secret for your Bubble upstream:
- Name:
BUBBLE_UPSTREAM - Type: Secret
- Value: your Bubble hosted address (example:
https://yourapp.bubbleapps.io)
- Name:
- Click Deploy.
Step 7: attach your custom domain to the Worker.
This step makes your domain work reliably through Cloudflare and avoids common errors like Error 1014 and Error 1000.
- In your Worker, open Settings.
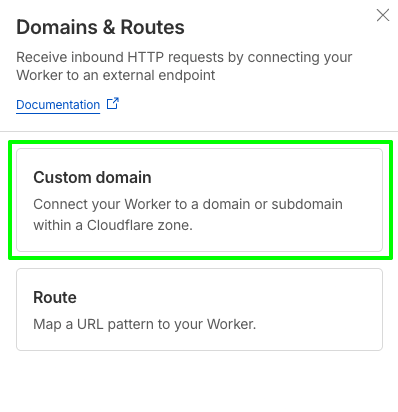
- Click Add next to Domains & Routes.

- Select Custom domain.
- Enter your domain. Add all variants you need, including
www.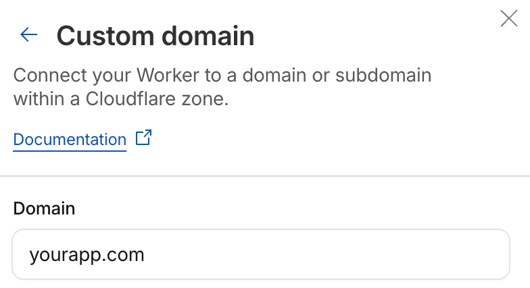
- Cloudflare creates the needed DNS records and SSL certificate automatically.
When complete, the Cloudflare DNS panel shows a Worker mapping for your domain.

Step 8: paste the Worker code and deploy.
- In Cloudflare, go to Workers & Pages > your Worker (you may find it under Compute or Compute and AI in the sidebar, depending on your account).
- Click Edit code (the button may read Edit or show a code icon — look for the inline browser editor entry point).
- Replace all existing code with the code from this Gist.
- Click Save and deploy.
Step 9: verify the integration is working.
Confirm Prerender.io is intercepting bot requests and serving pre-rendered HTML.
Option 1: simulate a Googlebot visit in Chrome. Check the response headers for x-prerender-request-id. If this header is present, Prerender.io is serving pre-rendered HTML to bots.
Option 2: use the dashboard verification tool. In your Prerender.io dashboard, go to the Get Started tab or Domain Manager and submit your domain for verification.
For full verification steps, see Verify your Prerender.io integration.
Your integration is working when the x-prerender-request-id response header appears on bot requests, or when your Prerender.io dashboard shows cached pages for your domain.
Related articles
- Verify your Prerender.io integration
- How Prerender.io works
- Available integrations
- How do I add multiple domains?